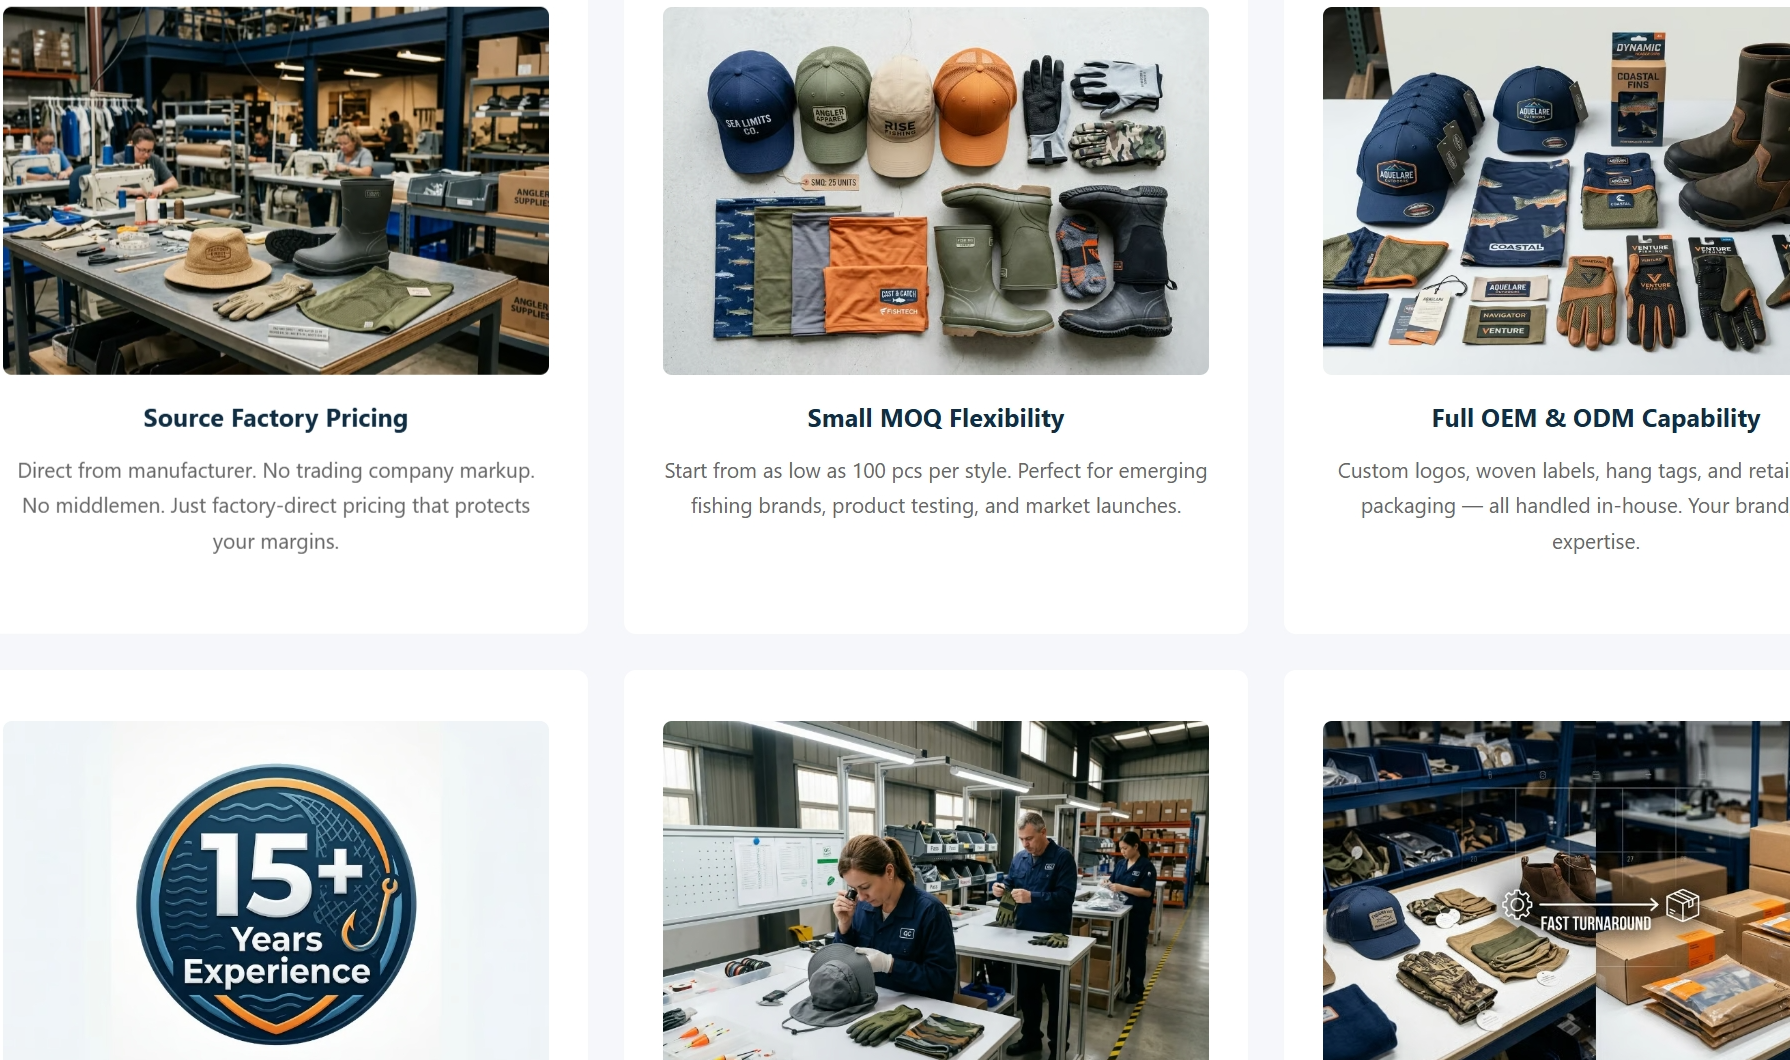
You've found a fishing accessories supplier who responds to your inquiry — and the first thing they ask is: "What's your MOQ? Do you have print-ready artwork?" Those two questions can stop most team managers and brand founders cold before placing their first custom fishing rash guards order.
Here's the truth: a smooth production run and a costly, color-mismatched disaster come down to three things you sort out before submitting your PO:
Artwork file prep
Understanding sublimation printing
Knowing where the real pricing leverage sits
This guide cuts the supplier fluff. You get a transparent, deal-tested framework — from locking down your artwork specs to negotiating MOQ without burning the relationship. Your first order ships right, on budget, the first time.
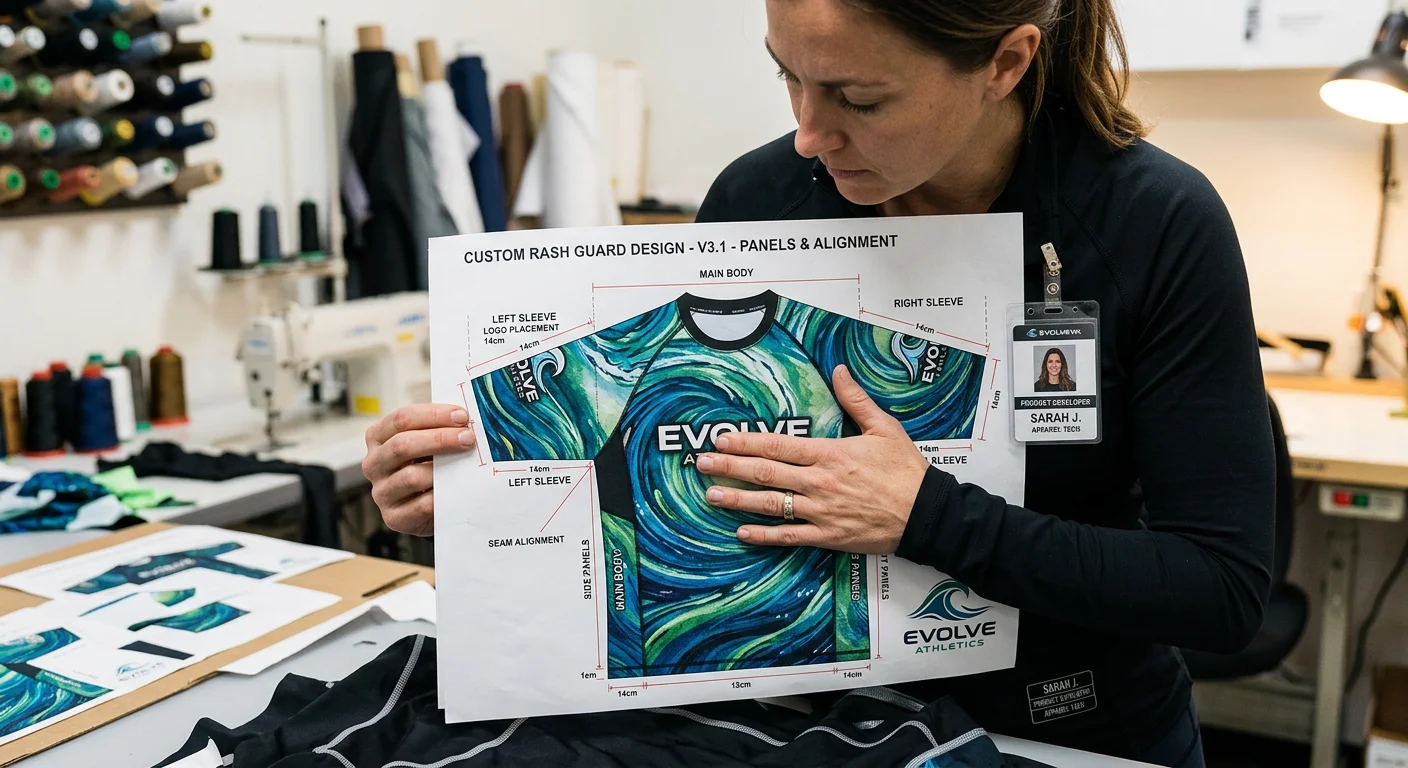
Artwork Submission Checklist & Technical Requirements
Bad artwork files are the single biggest reason custom fishing rash guard orders get delayed, reprinted, or returned with wrong colors. Get this step wrong and you're paying twice — in time and money.
Here's what your factory needs from you, broken down into six must-follow areas.
File Format: Vector First, Always
Submit your primary artwork as AI (Adobe Illustrator) or print-ready PDF . Every logo, text element, and shape must be vectorized. Do not embed raster images. Do not screenshot from Canva.
Why does this matter for rash guards? Compression fabric stretches up to 40% during wear. A low-resolution logo on the chest panel looks pixelated before the garment even ships. For photo-based textures or background imagery, embed them as PSD, TIF, or high-quality JPG at 300 DPI minimum at 100% print size .
One critical rule before you hit send: embed all linked files . A factory opening your AI file and finding broken image links kills your production timeline fast.
Resolution & Color Mode: The Two Mistakes That Ruin Prints
Most color disasters on sublimation rash guards come down to two errors:
1. Low-resolution raster art
- Photo elements and background textures: minimum 300 DPI at final print size
- Large all-over background gradients: 150–200 DPI is acceptable at full scale
- Team crests, sponsor marks, chest logos: 300 DPI or vector only — no exceptions
2. Submitting artwork in RGB instead of CMYK
Dye sublimation printing reads color differently than your monitor. An RGB file that looks vibrant on screen can shift — sometimes by a lot — once printed onto polyester-spandex fabric. Convert everything to CMYK before submission.
For brand-critical colors, don't stop at CMYK. Give your supplier the full three-way spec:
- Pantone code + CMYK breakdown + HEX value
Got neon, fluorescent, or high-saturation colors in your design? Flag them in your spec notes. These colors fall outside the standard CMYK gamut. Your supplier needs to run lab dips or test prints to set the right expectations early.
Template, Bleed & Safe Zone
Your fishing accessories factory will provide a garment dieline template. Do not resize it. Do not move the cut lines. Place your artwork onto their template as-is. Keep all layers — cut line, bleed line, safe zone — intact as supplied.
For full-color print rash guards and dye sublimation sportswear , use these standards:
Element | Specification |
|---|---|
Edge bleed | 5–10 mm beyond all seam/cut lines |
Safe zone for logos & text | Minimum 5–10 mm inside trim line |
Artwork scale | 1:1 — no "scale to fit" left to production |
Anything outside the safe zone — jersey numbers, sponsor logos, team names — risks getting eaten by a seam or hem. Check your sleeve panels and collar area on their own. Buyers miss these placements most often.
Layer Structure & Font Rules
Organize your AI file with named, separate layers:
Front / Back / Left Sleeve / Right Sleeve / Collar
Notes & Construction Annotations
Multiple print processes? Add separate layers for PRINTING , FOIL , WHITE INK , and SPOT UV
Before you export: convert every font to outlines . No exceptions. Live fonts hidden inside symbols or envelopes have held up production for brands that thought their files were clean. Run a final check every time.
The Pre-Flight Checklist (Print Before You Submit)
Before you package files and send them to any supplier, go through this list:
Artwork placed on correct fishing accessories manufacturer template at 100% scale
All logos and crests are vector or ≥300 DPI raster
Document color mode is CMYK — no stray RGB swatches
Pantone codes assigned and named right
Bleed extended 5–10 mm beyond all trim lines
No important content sitting outside the safe zone
All layers named and cleaned — unused layers deleted
All text outlined — zero live font warnings
Export a low-res PDF proof and check every panel by eye
Files packaged into a structured ZIP folder with consistent naming (e.g.,
Brand_RashGuard_Mens_LS_Black_SKU001.ai)
That last point — the low-res PDF proof — is one most buyers skip. Print it at 100% scale on a standard printer and hold it against your body. It takes three minutes. It catches placement errors that take three weeks to fix in production.
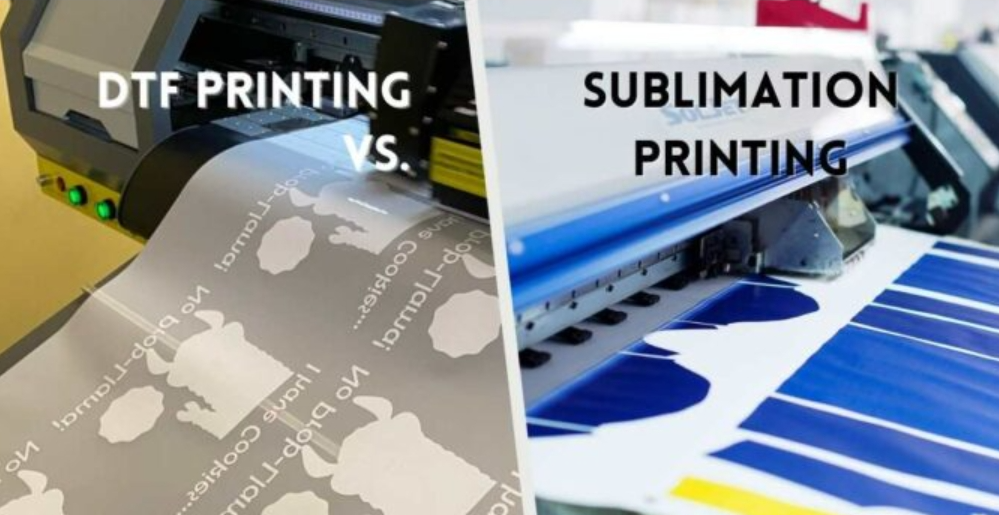
Sublimation Mechanics vs Screen Printing for Rash Guard Production
Dye sublimation isn't just the preferred printing method for rash guards. It's the one process that makes engineering sense for compression sportswear built to survive mat work.
Here's why the gap between these two processes matters to your order decision.
How Each Process Works
Sublimation heats ink into a gas state. That gas bonds inside the polyester fiber — not on top of it. Once it cools, the dye is locked in at the fiber level. Print and fabric become a single material. Under 40% stretch, the design moves with the garment. Under BJJ friction, there's no surface film to crack or peel. The fixation happens at 190–205°C for 30–60 seconds — a precise heat window that fuses color at a molecular level.
Screen printing works the opposite way. Plastisol or water-based ink sits on top of the fabric as a physical film. On a cotton tee, that's fine. On polyester-spandex compression fabric, it's a poor match. The rigid ink layer can't keep pace with the stretch of the base fabric. That leads to micro-cracking, distortion, and flaking at high-flex zones like the chest, lats, and shoulders.
One BJJ manufacturer said it straight: "You can get it screenprinted, but it's gonna damage the material and it's not gonna last… you really need to sublimate it."
The Fabric Compatibility Factor
Sublimation needs ≥80–90% polyester content to deliver vivid, washfast color. It can bond at ~50% polyester, but color density drops below 80%. Cotton and bamboo blends? The chemical bond doesn't form at all — colors come out washed out and fade fast.
The sweet spot for custom BJJ rash guards and dye sublimation sportswear:
- 80–92% polyester / 8–20% spandex
- 200–260 gsm compression knit
- UPF 30–50+ treated performance fabric
Screen printing was built for cotton. Running it on high-stretch polyester-spandex is a trade-off most serious team buyers regret within the first season.
Color Capability & Cost Structure
Sublimation wins on economics here. It's not even close.
Factor | Sublimation | Screen Printing |
|---|---|---|
Color count | Unlimited — no extra cost | Each color = separate screen + setup fee |
All-over design | Full panel coverage, seam to seam | Localized placement only |
Gradient/photorealistic art | Native capability | Not achievable |
Design change cost | Digital file swap | New screens required |
A full-color photographic all-over print costs the same per unit as a single-color logo under sublimation once digital setup is complete. Screen printing costs grow with each color added. A 6-color BJJ crest across front, back, and sleeves gets expensive fast.
Performance Impact You Can't Ignore
Sublimation leaves zero surface film . Breathability, moisture-wicking performance, 4-way stretch recovery, and UPF coatings stay intact — exactly as the fabric mill specifies. The design won't transfer onto training mats or training partners.
Screen printing adds a rubbery layer in contact zones. That causes real problems during ground work — restricted flex, localized chafing under a gi, and a surface that chips apart under rolling friction.
Where Screen Printing Is Acceptable
Skip screen printing unless all three conditions apply:
- You're using a solid-color blank rash guard with no all-over design
- You need a 1–2 color logo in a small, localized area (≤10×10 cm)
- Budget is very tight and you accept a shorter print lifespan
For any full color print rash guard, custom BJJ rash guard with multi-panel artwork, or compression shirt custom design with gradient or photorealistic elements — sublimation is the only viable production method .
MOQ Negotiation Tactics & Volume Optimization Strategies
Most factories quote you a MOQ and expect you to flinch. Don't. That number is a starting position, not a hard ceiling. Experienced buyers know which levers to pull to move it.
The core principle behind every successful MOQ negotiation: you trade certainty for flexibility . Give the factory a credible picture of future revenue. They'll give you a smaller first run. Simple as that.
Know Your Anchor Before You Ask
Before you propose any number, ask the factory one question: "What's driving your MOQ — setup time, fabric minimums, or something else?"
That answer shows you where to negotiate. A MOQ tied to fabric minimums is a different conversation than one tied to screen setup or cutting-room scheduling. Attack the actual constraint, not the headline number.
Here's a benchmark framework to anchor your outreach:
Order Size | Typical Market MOQ Range | Negotiation Leverage |
|---|---|---|
First pilot | 10–50 pcs/design/color | Pay a per-unit premium |
Trial run | ~25% of stated MOQ | Clean tech pack + sample |
Standard run | 100–300 pcs | Multiple colorways or styles |
Scale order | 300–500+ pcs | Reorder commitment letter |
A practical target: the factory quotes 1,000 units — open at 250. That's a 75% reduction. It's aggressive, but documented sourcing tactics back it up. You just need the right framing.
The Sample-First Strategy
Pay for a sample. It sounds like an odd cost-saving move, but a $150–$500 proto sample does two things at once:
It proves you're a serious buyer — not a tire-kicker — before MOQ even comes up.
It lets you lock your tech pack quality. One sourcing expert calls this "the single most effective way to lower MOQ pressure."
A clean tech pack with full specs, colorways, and size grading tells the factory their production risk is low. Low risk equals flexible minimums.
Structure the sample payment with a smart clause: propose that any per-unit surcharge on the pilot run gets credited back against your first full reorder . Most professional factories accept this framing without pushback.
Use Off-Peak Timing as a Bargaining Chip
Factory capacity isn't constant. 30% of firm MOQs become negotiable during off-peak production months — after the peak holiday season and before the summer sportswear rush. Ask straight out: "Do you have more flexibility on minimums if we schedule production in [off-peak window]?"
Don't frame it as a pure price cut. Frame it as off-peak production scheduling — you're filling dead capacity and doing the factory a favor. That reframe makes the conversation easier. You get a yes faster.
Design Consolidation: The Hidden MOQ Killer
Every unique colorway, trim component, or style variant adds to the factory's per-run complexity. More complexity drives MOQ up. Here's how to fight it:
Merge rosters into one base template. For team custom BJJ rash guards, use a single base design and vary only numbers, names, or size grading. Fewer setup changes means a lower minimum threshold.
Bundle fewer styles with more colors when MOQ is style-driven.
Lock one core colorway to hit the threshold , then propose splitting accent colors at 10 pcs each with a minor fabric surcharge.
A unique trim component is the bottleneck? Ask whether you can pay a surcharge on that component alone rather than increasing the entire order volume.
Long-Term Framing: Your Strongest Leverage Point
No tactic moves a factory faster than visible future revenue. A 3-season reorder commitment letter — even a non-binding letter of intent — can unlock a 40–60% MOQ reduction on your first run . This isn't a soft ask. It's a documented negotiation approach. It works because it answers the factory's core concern: will this buyer come back?
Make it concrete. Share a 6–12 month rolling forecast alongside your initial PO inquiry. Factories treat buyers with forecasts as partnership accounts, not spot orders. The MOQ conversation changes as a result.
Three Scripts You Can Use Right Now
Script 1 — Pilot-plus-premium:
"We're outfitting [X] athletes this season as a pilot run. Can we produce 20 units at a controlled markup, with a written clause that MOQ reverts to your standard tier on our Q3 reorder?"
Script 2 — Threshold-splitting:
"We'll lock one core colorway to hit your 30-piece threshold. For the remaining two accent colors, can we split at 10 pieces each with a minor fabric surcharge?"
Script 3 — Constraint-based:
"Is the MOQ tied to fabric or setup minimums? Can we use your stock fabric card and pay a small surcharge to reduce the first run quantity?"
Lock the Terms in Writing Before Production Starts
Verbal MOQ agreements disappear. Before any custom rash guard order moves to production, get these in your contract:
MOQ logic defined per-design, per-color, and per-material — not just a blanket number
Surcharge amount and credit-back terms on reorder spelled out in clear detail
Shipment tolerance, QC procedures, and revision policy documented
Reorder MOQ guarantee tied to your first-run commitment — so the reduced minimum doesn't vanish after the pilot
A factory that won't put a reduced MOQ in writing was never going to honor it. Get the signature or walk.
Transparent Pricing Gradient & Cost Breakdown by Order Volume
The single number that kills more custom rash guard deals isn't the MOQ — it's the unit price surprise. A buyer budgets $15 per piece, gets a quote for $28, and the whole project stalls. That gap isn't random. The cost is predictable. You just need to understand how cost stacks shift at different order volumes.
Here's the market reality, straight from B2B private-label sportswear quotes for 220–260 gsm polyester/spandex sublimation rash guards with flatlock seams, FOB China/Vietnam:
Order Volume | Real Market Unit Price | Typical Buyer Profile |
|---|---|---|
50 pcs | $18–$35 / unit | Trial club kits, small academy drops |
100 pcs | $14–$25 / unit | Standard team runs, local tournaments |
300 pcs | $10–$18 / unit | Regional distributors, multi-gym rollouts |
500+ pcs | $7–$14 / unit | Wholesale, private label, franchise networks |
Find your order size. Lock in your budget range. Now let's break down why those numbers move the way they do — knowing the mechanics gives you real negotiation power.
Why 50-Piece Orders Cost So Much More Per Unit
At 50 pieces, you're not paying a high markup. You're paying for fixed costs spread across very few units.
Here's what's inside a $25 unit cost at this tier:
Fabric + trim: $4.50–$5.50 — no bulk discount, mills charge full rate at low yardage
Labor (cut, sew, flatlock, QC): $4.00–$5.00
Sublimation print + paper: $3.00–$4.00 — small lot means inefficient paper usage
Pattern & grading setup: $200–$300 flat batch fee → $4–$6 per unit spread across just 50 pieces
Admin & pre-production: $100–$150 batch → $2–$3 per unit
Freight (air or small courier): $1.50–$3.00 per unit
That pattern and grading line alone accounts for 20–30% of your unit cost at this volume. You're not overpaying for the garment — you're absorbing the full setup cost on a tiny run.
What moves the needle at 50 pcs: Reuse an existing approved pattern. Use the factory's stock fabric card. Both eliminate or cut the biggest cost line items without touching the garment spec.
The 100-Piece Crossover Point
At 100 units, the math starts to shift in your favor.
Pattern + grading: same $200–$300 batch fee → now just $2–$3 per unit
Fabric: polyester/spandex bulk pricing kicks in at 100–200 meters, trimming 5–10% off the fabric component
Labor: better line rhythm, fewer stops → $3.50–$4.50 per unit
Sublimation print + paper: $2.50–$3.20 — more efficient paper yields
Indicative ex-factory range: $14–$22 per unit. Setup costs drop from 20–30% to around 10–15% of total unit cost. That's real money saved.
One catch at this tier: a wide size spread (XS through XXL) with multiple colorways still creates inefficiency. Tighten your size range or consolidate colorways. You'll land at the lower end of the price band.
300 Pieces: Where Economies of Scale Become Meaningful
This is the volume tier where a full production day gets booked to your order — and that matters.
Sublimation print optimization: full-width paper rolls run at planned yields → $2.00–$2.50 per unit
Fabric: firm bulk discount with better marker efficiency → $3.50–$4.20 per unit
Pattern + grading batch cost: now just $0.70–$1.00 per unit
Freight: often your first LCL ocean consolidation → $0.70–$1.50 per unit
Indicative ex-factory range: $10–$17 per unit.
At 300 pieces, QC and admin overhead together fall below 10% of unit cost. Some suppliers start offering structured volume discount tiers — 5–15% off once you cross a stated threshold. Ask for it directly. It's not always offered upfront.
500+ Pieces: Assembly-Line Economics
Above 500 units, you're in a different cost environment.
Fabric negotiated at mill-tier pricing — consider futures or long-term buy commitments to lock rates
Labor: consistent assembly-line flow → $2.50–$3.20 per unit
Sublimation print + paper: $1.70–$2.20 per unit
Pattern amortization: $0.40–$0.60 per unit — near zero impact on total cost
Freight (sea FCL/LCL): $0.40–$1.00 per unit
Indicative ex-factory range: $7–$13 per unit. Research across wholesale sportswear sourcing shows volume discounts of 5–25% across the 50→500+ range — which is what these tier bands reflect.
Hidden Cost Adders That Blow Budgets
The table above is clean. Real orders are not. Here's what adds cost without warning:
Rush production: cutting standard lead time from 45 to 20 days triggers a +20–30% surcharge on unit price
Extra colorways on small runs: each added color variant under 100 pcs adds $3–$5 per piece due to separate print files and higher fabric scrap
Non-standard sizing (4XL–6XL, youth): one-time grading fee of $100–$250 per size block , plus oversizes use 5–15% more fabric per unit
DDP vs. FOB: switching from FOB Asia to DDP USA adds ocean freight, customs brokerage, and last-mile ground shipping — $1.60–$4.80 per unit at the 300–500 piece range
U.S. import duties (HS 6211.43): MFN tariff for synthetic fiber sportswear runs 10–12% of customs value — on a $10 customs-value rash guard, that's $1.00–$1.20 per unit straight onto your P&L
The number buyers miss most: fabric mill overruns on small orders. Say the mill MOQ is 500 meters and your 100-piece order uses 150 meters. The cost of the leftover 350 meters gets absorbed into your job. That pushes fabric cost up by $1–$2 per unit before the factory even adds a margin.
Four Moves That Protect Your Unit Economics
You can't always change your order volume. You can change how well that order is structured.
1. Lock a 12-month volume price grid. Negotiate fixed unit rates per tier (100–299 / 300–499 / 500+ pcs) with 12-month validity. This protects you from fabric price spikes and seasonal labor surcharges that silently inflate reorder costs.
2. Standardize your collar and zip configuration. Fix 1–2 approved constructions. This cuts line changeover complexity and saves $0.50–$1.50 per unit at 300+ pieces — savings that add up across every reorder.
3. Bundle flatlock stitching and UV coating into your base tech pack. As add-ons, these cost $0.50–$1.00 for UV finish and $0.80–$1.20 for upgraded seams per unit. Roll them into your standard spec and negotiate one all-in rate instead.
4. Consolidate two smaller seasonal orders into one. A team planning two runs of 150 pieces in a single season should combine them into one 300-piece PO. That's the difference between $18–$25 per unit and $10–$18 per unit — $3,000–$4,500 in savings on a $15,000 order, with no change to what you're ordering.
Use these numbers as your negotiation anchor, not just reference data. A supplier quoting $28 per unit on a 100-piece sublimation rash guard order with no complex trim is overcharging. You now know what the cost stack looks like from the inside.
Factory Quality Inspection & Specification Verification
A shipment of 300 custom rash guards with color drift, popped flatlock seams, and undersized chest panels costs you $6,000–$9,000. Most buyers make that mistake once. Don't hope your supplier gets it right. Build a QC framework with measurable pass/fail thresholds into your PO before production starts. That's what separates professional buyers from first-timers.
Fabric Verification: Start Before a Single Stitch Is Sewn
Your QC process should start the moment bulk fabric arrives at the factory. Don't wait for sewing to begin.
Fiber composition: Demand a Certificate of Analysis (COA) from your supplier for every batch. Your target spec for dye sublimation sportswear: 82–88% polyester / 12–18% spandex by weight . Drop below that polyester floor on rash guard fabric and sublimation color density takes a hit. Run third-party fiber content testing to ISO 1833 at regular intervals — supplier paperwork alone isn't enough.
UPF protection: Selling to surf clubs or outdoor training markets? This is non-negotiable. Require a UPF 50+ test report per fabric lot, tested to AS/NZS 4399 or AATCC 183. Accept nothing below UPF 50 with UVA/UVB blocking ≥ 97.5%. Cross-check the lot number on the lab report against the actual fabric roll tags. Mismatches happen more than suppliers admit.
4-way stretch and recovery: Set your benchmark to ASTM D2594 or ISO 20932. Acceptable thresholds for compression rash guard fabric:
- Stretch: ≥120% in both warp and weft directions
- Recovery: ≥90% after the first cycle , ≥85% after the third
Any inspector can run a quick field check without lab equipment. Mark a 10 cm segment, stretch to 22 cm, release, and wait 10 minutes. Permanent elongation over 1.5 cm means you reject the lot.
Anti-pilling and abrasion resistance: Specify pilling grade ≥ 4 after 5,000 rubs on Martindale. For abrasion, set the threshold at Martindale ≥ 10,000 cycles on the face side — no hole formation, no severe yarn breakage. Track cycles to first yarn break per lot. That data lets you compare suppliers and spot trends across seasons.
Shade consistency: Build an approved shade band for each colorway. During incoming quality control, hold a ΔE ≤ 1.0–1.5 tolerance against your standard, checked under D65 light. See visible side-center-side shading at one meter? That roll doesn't reach the cutting table.
Seam & Stitching Inspection: Where Full Color Print Rash Guards Fail in the Field
Flatlock stitching looks simple on a rash guard. The failure points are not.
Stitch type and SPI: Specify 4-needle 6-thread flatlock for all major seams , with 10–14 stitches per inch (SPI) . Document the actual SPI range per style, per production run. Go outside that band and seam stretch failures show up before the first training season ends.
Seam alignment tolerance: Set panel-to-panel offset tolerance at ≤1.5 mm . Measure at shoulder points, side seams at chest and waist, and sleeve underarm. Check 10 points per garment. More than 2 of 10 exceed 1.5 mm — the lot fails.
Skipped stitches: Hold AQL 0 on all high-stress seams — armpit, shoulder, side seam. Zero tolerance, no exceptions. A skipped stitch in an armhole seam on a BJJ rash guard blows open mid-roll. That's a product liability issue, not just a quality complaint.
Seam elasticity check: Stretch the seam to 120–130% of garment width. No cracking, no thread pop, no tunneling. Use polyester textured or corespun 40s–60s thread with needle size 75–80 for stretchy knit construction.
Stress-zone reinforcement: Require bar-tacks at underarm seam intersections and side seam/hem junctions. Each bar-tack: 8–12 mm long, minimum 18 stitches . Non-negotiable on custom BJJ rash guards — seam stress in those zones is extreme.
Print Durability & Color Fidelity Standards
Your sublimation print passed visual approval at the sample stage. Bulk production is a different story. Don't assume the standard holds without testing.
Colorfastness to washing: Require test reports to ISO 105-C06 or AATCC 61. Minimum grades: color change ≥ 4, staining on adjacent multi-fiber fabric ≥ 4 , tested at 40°C for one to five cycles depending on your end-use market.
Perspiration, seawater, and chlorine resistance: For surf and swim applications, all three tests are required:
- Perspiration: ISO 105-E04 — ≥ grade 4
- Sea water: ISO 105-E02 — ≥ grade 4
- Chlorinated water: ISO 105-E03 — ≥ grade 4
Print-to-cut edge alignment: Hold ≤2 mm deviation between print edge and cut line. Check at side seams for text and stripes, and center front logo against garment centerline. Measure five to ten pieces per size per color — not just one sample.
Dye migration: This failure mode catches buyers off guard. For dark prints next to white or light panels, run a migration test. Press at 140–160°C for 30 seconds, store for 24 hours, then check for staining. Visible ghosting or a lab rating below grade 4 staining is an automatic reject. This problem gets worse in storage and hot shipping containers. Catch it before the cartons seal.
Sizing, Fit, and Final Release Protocol
Measurement tolerance: Set ±1.5 cm for standard body points of measure (POMs) on compression garments. Tighten to ±1.0 cm for neck opening and sleeve length. At final inspection, measure at least five pieces per size per color. More than two of ten pieces exceed tolerance on the same point of measure — fail the lot.
Pre-production fit approval: Before bulk cutting, get an S/M/L size set sewn in bulk fabric and bulk trims. Fit on live models or spec-matched fit forms. Check compression level at shoulder and underarm. Confirm hems don't roll or flare. Issue bulk cut approval after written sign-off — not before. Skip this step on a 500-piece run and you'll end up with a garment your athletes refuse to wear.
Shrinkage control: Require fabric shrinkage testing to ISO 5077 or AATCC 135. Acceptable threshold: ≤5% in both warp and weft after the specified wash/dry cycle. Shrinkage over 3% in either direction means patterns need adjustment before bulk cutting starts.
Documentation, Chemical Safety & Final Payment Release
Chemical compliance: Collect per color, per lot: AZO-free dye certificate per EU Annex XVII, formaldehyde-free or <75 ppm report to OEKO-TEX or ISO 14184-1. Add heavy metal and phthalate reports for EU or US children's markets.
Final random inspection (FRI): Run on AQL 2.5 major / 4.0 minor sampling. Every FRI report must include inspector name, date, sample size, AQL level, and defect counts. Back it up with a batch QC photo archive — packed cartons, folded goods, seam close-ups, and POM measurements.
Payment release rule: Make this non-negotiable. Balance payment releases after a passed FRI report — full stop. A factory that pushes back on this clause is showing you exactly how much they value your quality standards. A supplier who stands behind their work signs that condition without hesitation.
High-Risk Order Pitfalls & Pre-Signing Safeguards

Experienced buyers don't get burned on bad custom rash guard orders because they're careless. They get burned because they moved too fast. There was no verification step between "order received" and "production started."
Here's the rule that protects your money: treat every unverified order as hold-for-verification by default — not auto-accept.
The Pre-Signing Checklist That Stops Costly Mistakes
Sign zero POs and book zero production slots before running every order through these six checkpoints:
Billing and shipping identity match — Mismatched details are the most common warning sign. Check that both names and addresses line up.
Phone and email validation — Call the number on file. Nobody answers and the email bounces? Stop the order right there.
Payment pattern review — Multiple failed payment attempts before a charge goes through? Flag it and hold.
Address consistency check — Multiple orders going to the same shipping address under different names or billing details? That's a hard stop. Do not proceed.
Artwork source-file verification — For custom sublimation rash guard orders, get validated print-ready files before production starts. Your factory liability clause must exclude defects that come from unverified artwork files. Put that in writing.
Manual callback confirmation — Two or more risk signals on one order? Call the buyer. Compare their answers against the order record, point by point.
The Decision Rule Nobody Talks About
Multiple risk signals show up at once — mismatched billing, odd quantity, irregular payment behavior? Cancel and refund. Don't try to fix it or push it through.
The math is simple. One bad order can trigger a chargeback. That chargeback puts your entire supplier payment account at risk. No rash guard run is worth that.
Verify first. Ship second. Always.
Conclusion
You now have everything you need to place your first custom rash guard order. No wasted budget. No avoidable mistakes.
Here's what separates buyers who get this right from those who don't:
They treat artwork preparation with the same care as price negotiation.
They know sublimation printing is the right choice for full-color compression garments — not just one option among many.
They never take a factory's opening MOQ as a final number.
Your next step is simple. Pull up your design files tonight. Check the resolution. Flip it to CMYK. Confirm your bleeds. Get all of that done before you reach out to a single fishing accessories supplier. Solid artwork puts you in a strong position. You negotiate from confidence, not pressure.
The brands winning in custom BJJ rash guards and team sportswear aren't spending more. They're ordering smarter.
Now go build something worth wearing.